快速开始
大约 8 分钟
Android 集成文档
快速开始
利用环信 CallKit(基于 IM 4.16.0 或以上版本),你可以轻松实现一对一通话和群组通话功能。本文介绍如何快速实现发起音视频通话。
推荐环境
- Android SDK: API Level 24 或以上版本
- Android Studio: 推荐最新版本
- Kotlin: 2.0.21
- JDK: 17
- Gradle 版本: 8.13
前提条件
在 环信控制台 进行如下操作:
- 注册环信账号。
- 创建应用,获取应用的 App Key,格式为
orgname#appname。 - 创建用户,获取用户 ID 和 Token。
- 开通音视频服务。为了保障流畅的用户体验,开通服务后,你需等待 15 分钟才能实现发起音视频通话。
快速开始
步骤 1 创建项目
本节介绍将环信 CallKit 引入项目中的必要环境配置。
本示例使用 Android Studio Narwhal | 2025.1.1、gradle version : 8.13 和 gradle plugin version:8.11.1。你也可以直接参考 Android Studio 官网文档 创建应用。
- 打开 Android Studio,点击左上角菜单 File > New > New Project。
- 在 New Project 界面,Phone and Tablet 标签下,选择 Empty Views Activity,然后点击 Next。
- 在 Empty Views Activity 界面,依次填入以下内容:
- Name:你的 Android 项目名称,如 CallKitQuickstart。
- Package name:你的项目包的名称,如 com.hyphenate.callkit.quickstart。
- Save location:项目的存储路径。
- Language:项目的编程语言,如 Kotlin。
- Minimum SDK:项目的最低 API 等级,如 API 24。
- Build configuration language:工程构建语言,如 Kotlin DSL(build.gradle.kts)。
- 点击 Finish。根据屏幕提示,安装所需插件。
步骤 2 引入 CallKit
添加依赖
远程依赖
- 在 Project 工程根目录下的
settings.gradle.kts文件内,添加mavenCentral()仓库:
pluginManagement {
   repositories {
      ...
      mavenCentral()
   }
}
dependencyResolutionManagement {
    repositoriesMode.set(RepositoriesMode.FAIL_ON_PROJECT_REPOS)
    repositories {
        ...
        mavenCentral()
    }
}
- 在 app(module) 目录的
build.gradle.kts文件中添加以下依赖。关于 CallKit 的最新版本,详见 Maven 仓库。
dependencies {
    ...
    implementation("io.hyphenate:chat-call-kit:4.16.0")
}
本地依赖
从 GitHub 或 Gitee 中获取音视频 CallKit 源码,克隆到本地。按照下面的方式集成:
- 在 Project 工程根目录下的
settings.gradle.kts文件中添加如下代码:
include(":ease-call-kit")
// "../easemob-callkit-android"要替换成你clone下来的实际工程路径,后边要拼接"/ease-call-kit"
project(":ease-call-kit").projectDir = File("../easemob-callkit-android/ease-call-kit")
- 在 app(module) 目录的
build.gradle.kts文件中添加如下代码:
dependencies {
    ...
    implementation(project(":ease-call-kit"))
}
配置 ViewBinding
在 app 项目的 build.gradle.kts 文件中添加如下代码:
android {
    ...
    buildFeatures{
        viewBinding = true
    }
}
Android Support 库向 AndroidX 转换配置
在 Project 工程根目录下的 gradle.properties 文件中额外添加如下配置:
android.enableJetifier=true
防止代码混淆
在 app 的 proguard-rules.pro 文件中添加如下代码:
-keep class com.hyphenate.** {*;}
-dontwarn  com.hyphenate.**
-keep class io.agora.** {*;}
-dontwarn  io.agora.**
步骤 3 创建快速开始页面
- 打开
app/src/main/res/values/strings.xml文件,替换为如下内容。
你需要将 app_key 替换为你申请的环信 App Key,user_name 替换为你的用户名,token 替换为你用户名对应的token。
<resources>
    <string name="app_name">CallKitQuickstart</string>
    <string name="app_key">app_key</string>
    <string name="user_name">your userId</string>
    <string name="token">your token</string>
</resources>
- 打开
app/src/main/res/layout/activity_main.xml文件,替换为如下内容:
app/src/main/res/layout/activity_main.xml 文件中的替换代码
<androidx.constraintlayout.widget.ConstraintLayout xmlns:android="http://schemas.android.com/apk/res/android"
    xmlns:app="http://schemas.android.com/apk/res-auto"
    xmlns:tools="http://schemas.android.com/tools"
    android:id="@+id/main"
    android:layout_width="match_parent"
    android:layout_height="match_parent"
    android:padding="16dp"
    tools:context=".MainActivity">

    <View
        android:id="@+id/statusIndicator"
        android:layout_width="0dp"
        android:layout_height="8dp"
        android:layout_marginTop="16dp"
        android:background="#808080"
        app:layout_constraintEnd_toEndOf="parent"
        app:layout_constraintStart_toStartOf="parent"
        app:layout_constraintTop_toTopOf="parent" />

    <TextView
        android:id="@+id/tvConnectionStatus"
        android:layout_width="wrap_content"
        android:layout_height="wrap_content"
        android:layout_marginTop="8dp"
        android:text="连接状态: 未连接"
        android:textSize="14sp"
        android:textColor="#666666"
        app:layout_constraintEnd_toEndOf="parent"
        app:layout_constraintStart_toStartOf="parent"
        app:layout_constraintTop_toBottomOf="@+id/statusIndicator" />

    <Button
        android:id="@+id/btnLogin"
        android:layout_width="0dp"
        android:layout_height="wrap_content"
        android:layout_marginTop="16dp"
        android:text="登录"
        app:layout_constraintEnd_toEndOf="parent"
        app:layout_constraintStart_toStartOf="parent"
        app:layout_constraintTop_toBottomOf="@+id/tvConnectionStatus" />

    <Button
        android:id="@+id/btnLogout"
        android:layout_width="0dp"
        android:layout_height="wrap_content"
        android:layout_marginTop="8dp"
        android:text="登出"
        app:layout_constraintEnd_toEndOf="parent"
        app:layout_constraintStart_toStartOf="parent"
        app:layout_constraintTop_toBottomOf="@+id/btnLogin" />

    <EditText
        android:id="@+id/etPeerId"
        android:layout_width="0dp"
        android:layout_height="50dp"
        android:layout_marginTop="24dp"
        android:hint="对方用户ID"
        android:singleLine="true"
        android:maxLines="1"
        android:imeOptions="actionDone"
        android:inputType="text"
        app:layout_constraintEnd_toEndOf="parent"
        app:layout_constraintStart_toStartOf="parent"
        app:layout_constraintTop_toBottomOf="@+id/btnLogout" />

    <Button
        android:id="@+id/btnSingleVideo"
        android:layout_width="0dp"
        android:layout_height="wrap_content"
        android:layout_marginTop="16dp"
        android:text="发起一对一视频通话"
        app:layout_constraintEnd_toEndOf="parent"
        app:layout_constraintStart_toStartOf="parent"
        app:layout_constraintTop_toBottomOf="@+id/etPeerId" />

    <Button
        android:id="@+id/btnSingleAudio"
        android:layout_width="0dp"
        android:layout_height="wrap_content"
        android:layout_marginTop="8dp"
        android:text="发起一对一音频通话"
        app:layout_constraintEnd_toEndOf="parent"
        app:layout_constraintStart_toStartOf="parent"
        app:layout_constraintTop_toBottomOf="@+id/btnSingleVideo" />

</androidx.constraintlayout.widget.ConstraintLayout>
步骤 4 实现代码逻辑
- 初始化 CallKit。
- 实现登录和退出逻辑。
- 实现通话功能。
打开 MainActivity 文件,替换为如下代码(以包名 com.hyphenate.callkit.quickstart 为例):
MainActivity 文件中的替换代码
package com.hyphenate.callkit.quickstart

import android.R.attr.password
import android.os.Bundle
import android.widget.Toast
import androidx.appcompat.app.AppCompatActivity
import com.hyphenate.callkit.CallKitClient
import com.hyphenate.callkit.CallKitConfig
import com.hyphenate.callkit.bean.CallType
import com.hyphenate.callkit.bean.CallEndReason
import com.hyphenate.callkit.bean.CallInfo
import com.hyphenate.callkit.interfaces.CallKitListener
import com.hyphenate.callkit.utils.ChatClient
import com.hyphenate.callkit.utils.ChatCallback
import com.hyphenate.callkit.utils.ChatOptions
import com.hyphenate.callkit.utils.ChatConnectionListener
import com.hyphenate.callkit.quickstart.databinding.ActivityMainBinding
import com.hyphenate.callkit.utils.ChatLog
import io.agora.rtc2.RtcEngine
import kotlinx.coroutines.CoroutineScope
import kotlinx.coroutines.Dispatchers
import kotlinx.coroutines.launch
import org.json.JSONObject
import android.view.KeyEvent
import android.view.inputmethod.InputMethodManager
import android.view.inputmethod.EditorInfo
import android.content.Context

class MainActivity : AppCompatActivity() {
    private lateinit var binding: ActivityMainBinding
    private var isLoggedIn = false
    private val TAG = this::class.simpleName

    // CallKit 监听器
    private val rtcListener: CallKitListener = object : CallKitListener {

        override fun onEndCallWithReason(reason: CallEndReason, callInfo: CallInfo?) {
            runOnUiThread {
                val msg = "通话结束: $reason ,callInfo: $callInfo"
                ChatLog.d(TAG, msg)
                Toast.makeText(this@MainActivity, msg, Toast.LENGTH_SHORT).show()
            }
        }

        override fun onCallError(
            errorType: CallKitClient.CallErrorType,
            errorCode: Int,
            description: String?
        ) {
            runOnUiThread {
                val msg = "通话错误: $errorType ,errorCode: $errorCode ,description: $description"
                ChatLog.d(TAG, msg)
                Toast.makeText(this@MainActivity, msg, Toast.LENGTH_SHORT).show()
            }
        }

        override fun onReceivedCall(userId: String, callType: CallType, ext: JSONObject?) {
            runOnUiThread {
                val msg = "收到通话邀请: $userId ,callType: $callType ,ext: $ext"
                ChatLog.d(TAG, msg)
                Toast.makeText(this@MainActivity, msg, Toast.LENGTH_SHORT).show()
            }
        }

        override fun onRemoteUserJoined(userId: String, callType: CallType, channelName: String) {
            runOnUiThread {
                val msg = "远端用户加入: $userId ,callType: $callType ,channelName: $channelName"
                ChatLog.d(TAG, msg)
                Toast.makeText(this@MainActivity, msg, Toast.LENGTH_SHORT).show()
            }
        }

        override fun onRemoteUserLeft(userId: String, callType: CallType, channelName: String) {
            runOnUiThread {
                val msg = "远端用户离开: $userId ,callType: $callType ,channelName: $channelName"
                ChatLog.d(TAG, msg)
                Toast.makeText(this@MainActivity, msg, Toast.LENGTH_SHORT).show()
            }
        }

        override fun onRtcEngineCreated(engine: RtcEngine) {
            runOnUiThread {
                val msg = "RTC引擎创建: $engine"
                ChatLog.d(TAG, msg)
                Toast.makeText(this@MainActivity, msg, Toast.LENGTH_SHORT).show()
            }
        }

    }

    // 连接状态监听器
    private val connectionListener = object : ChatConnectionListener {
        override fun onConnected() {
            runOnUiThread {
                updateConnectionStatus(true, "连接状态: 已连接")
            }
        }

        override fun onDisconnected(errorCode: Int) {
            runOnUiThread {
                updateConnectionStatus(false, "连接状态: 已断开")
            }
        }

        override fun onLogout(errorCode: Int) {
            runOnUiThread {
                updateConnectionStatus(false, "连接状态: 已登出")
                isLoggedIn = false
                updateButtonStates()
            }
        }

        override fun onTokenExpired() {
            runOnUiThread {
                updateConnectionStatus(false, "连接状态: Token已过期")
                showToast("Token已过期,请重新登录")
            }
        }

        override fun onTokenWillExpire() {
            runOnUiThread {
                showToast("Token即将过期")
            }
        }
    }

    override fun onCreate(savedInstanceState: Bundle?) {
        super.onCreate(savedInstanceState)
        binding = ActivityMainBinding.inflate(layoutInflater)
        setContentView(binding.root)

        initCallKit()
        setupClickListeners()
        updateButtonStates()
        setupConnectionListener()
    }

    private fun initCallKit() {
        val appkey = getString(R.string.app_key)
        if (appkey.isEmpty()) {
            showToast("请先设置您的AppKey!")
            return
        }

        // 初始化环信IM SDK
        val options = ChatOptions().apply {
            this.appKey = appkey
            autoLogin = false
        }
        ChatClient.getInstance().init(this, options)
        ChatClient.getInstance().setDebugMode(true)

        // 初始化CallKit
        val config = CallKitConfig()

        CallKitClient.init(this, config)
        CallKitClient.callKitListener = rtcListener
    }

    private fun setupConnectionListener() {
        ChatClient.getInstance().addConnectionListener(connectionListener)
        updateConnectionStatus(false, "连接状态: 未连接")
    }

    private fun updateConnectionStatus(isConnected: Boolean, statusText: String) {
        binding.tvConnectionStatus.text = statusText
        if (isConnected) {
            binding.statusIndicator.setBackgroundColor(0xFF4CAF50.toInt()) // 绿色
            binding.tvConnectionStatus.setTextColor(0xFF4CAF50.toInt())
        } else {
            binding.statusIndicator.setBackgroundColor(0xFF808080.toInt()) // 灰色
            binding.tvConnectionStatus.setTextColor(0xFF808080.toInt())
        }
    }

    private fun setupClickListeners() {
        // 设置键盘监听
        setupKeyboardListeners()

        binding.btnLogin.setOnClickListener {
            val username =  getString(R.string.user_name)
            val token = getString(R.string.token)
            if (username.isEmpty() || token.isEmpty()) {
                showToast("用户名或token不能为空!")
                return@setOnClickListener
            }
            login(username, token)
        }

        binding.btnLogout.setOnClickListener { logout() }
        binding.btnSingleVideo.setOnClickListener { startSingleVideoCall() }
        binding.btnSingleAudio.setOnClickListener { startSingleAudioCall() }
    }

    private fun setupKeyboardListeners() {

        // 为对方用户ID输入框添加键盘监听
        binding.etPeerId.setOnEditorActionListener { _, actionId, event ->
            if (actionId == android.view.inputmethod.EditorInfo.IME_ACTION_DONE ||
                actionId == android.view.inputmethod.EditorInfo.IME_ACTION_NEXT ||
                (event?.keyCode == KeyEvent.KEYCODE_ENTER && event.action == KeyEvent.ACTION_DOWN)) {
                hideKeyboard()
                true
            } else {
                false
            }
        }
    }

    private fun hideKeyboard() {
        val inputMethodManager = getSystemService(Context.INPUT_METHOD_SERVICE) as InputMethodManager
        currentFocus?.let { view ->
            inputMethodManager.hideSoftInputFromWindow(view.windowToken, 0)
            view.clearFocus()
        }
    }

    private fun login(username: String, token: String) {
        if (isLoggedIn) {
            showToast("已经登录")
            return
        }

        ChatClient.getInstance().loginWithToken(username, token, object : ChatCallback {
            override fun onSuccess() {
                runOnUiThread {
                    isLoggedIn = true
                    updateButtonStates()
                    showToast("登录成功")
                }
            }

            override fun onError(code: Int, error: String?) {
                runOnUiThread {
                    showToast("登录失败: $error")
                }
            }
        })
    }

    private fun logout() {
        if (!isLoggedIn) {
            showToast("尚未登录")
            return
        }

        ChatClient.getInstance().logout(true, object : ChatCallback {
            override fun onSuccess() {
                runOnUiThread {
                    updateConnectionStatus(false, "连接状态: 已登出")
                    isLoggedIn = false
                    updateButtonStates()
                    CallKitClient.endCall()
                    showToast("登出成功")
                }
            }

            override fun onError(code: Int, error: String?) {
                runOnUiThread {
                    showToast("登出失败: $error")
                }
            }
        })
    }

    private fun startSingleVideoCall() {
        if (!isLoggedIn) {
            showToast("请先登录")
            return
        }

        val remoteUserID = binding.etPeerId.text.toString().trim()
        if (remoteUserID.isEmpty()) {
            showToast("对方用户ID不能为空")
            return
        }

        CallKitClient.startSingleCall(CallType.SINGLE_VIDEO_CALL, remoteUserID, null)
    }

    private fun startSingleAudioCall() {
        if (!isLoggedIn) {
            showToast("请先登录")
            return
        }

        val remoteUserID = binding.etPeerId.text.toString().trim()
        if (remoteUserID.isEmpty()) {
            showToast("对方用户ID不能为空")
            return
        }

        CallKitClient.startSingleCall(CallType.SINGLE_VOICE_CALL, remoteUserID, null)
    }


    private fun updateButtonStates() {
        binding.btnLogin.isEnabled = !isLoggedIn
        binding.btnLogout.isEnabled = isLoggedIn
        binding.btnSingleVideo.isEnabled = isLoggedIn
        binding.btnSingleAudio.isEnabled = isLoggedIn
    }

    override fun onDestroy() {
        super.onDestroy()
        ChatClient.getInstance().removeConnectionListener(connectionListener)
    }

    private fun showToast(msg: String) {
        CoroutineScope(Dispatchers.Main).launch {
            Toast.makeText(this@MainActivity, msg, Toast.LENGTH_SHORT).show()
        }
    }
}
点击 Android Studio 菜单栏中的 Sync Project with Gradle Files 同步工程。现在可以发起首次通话。
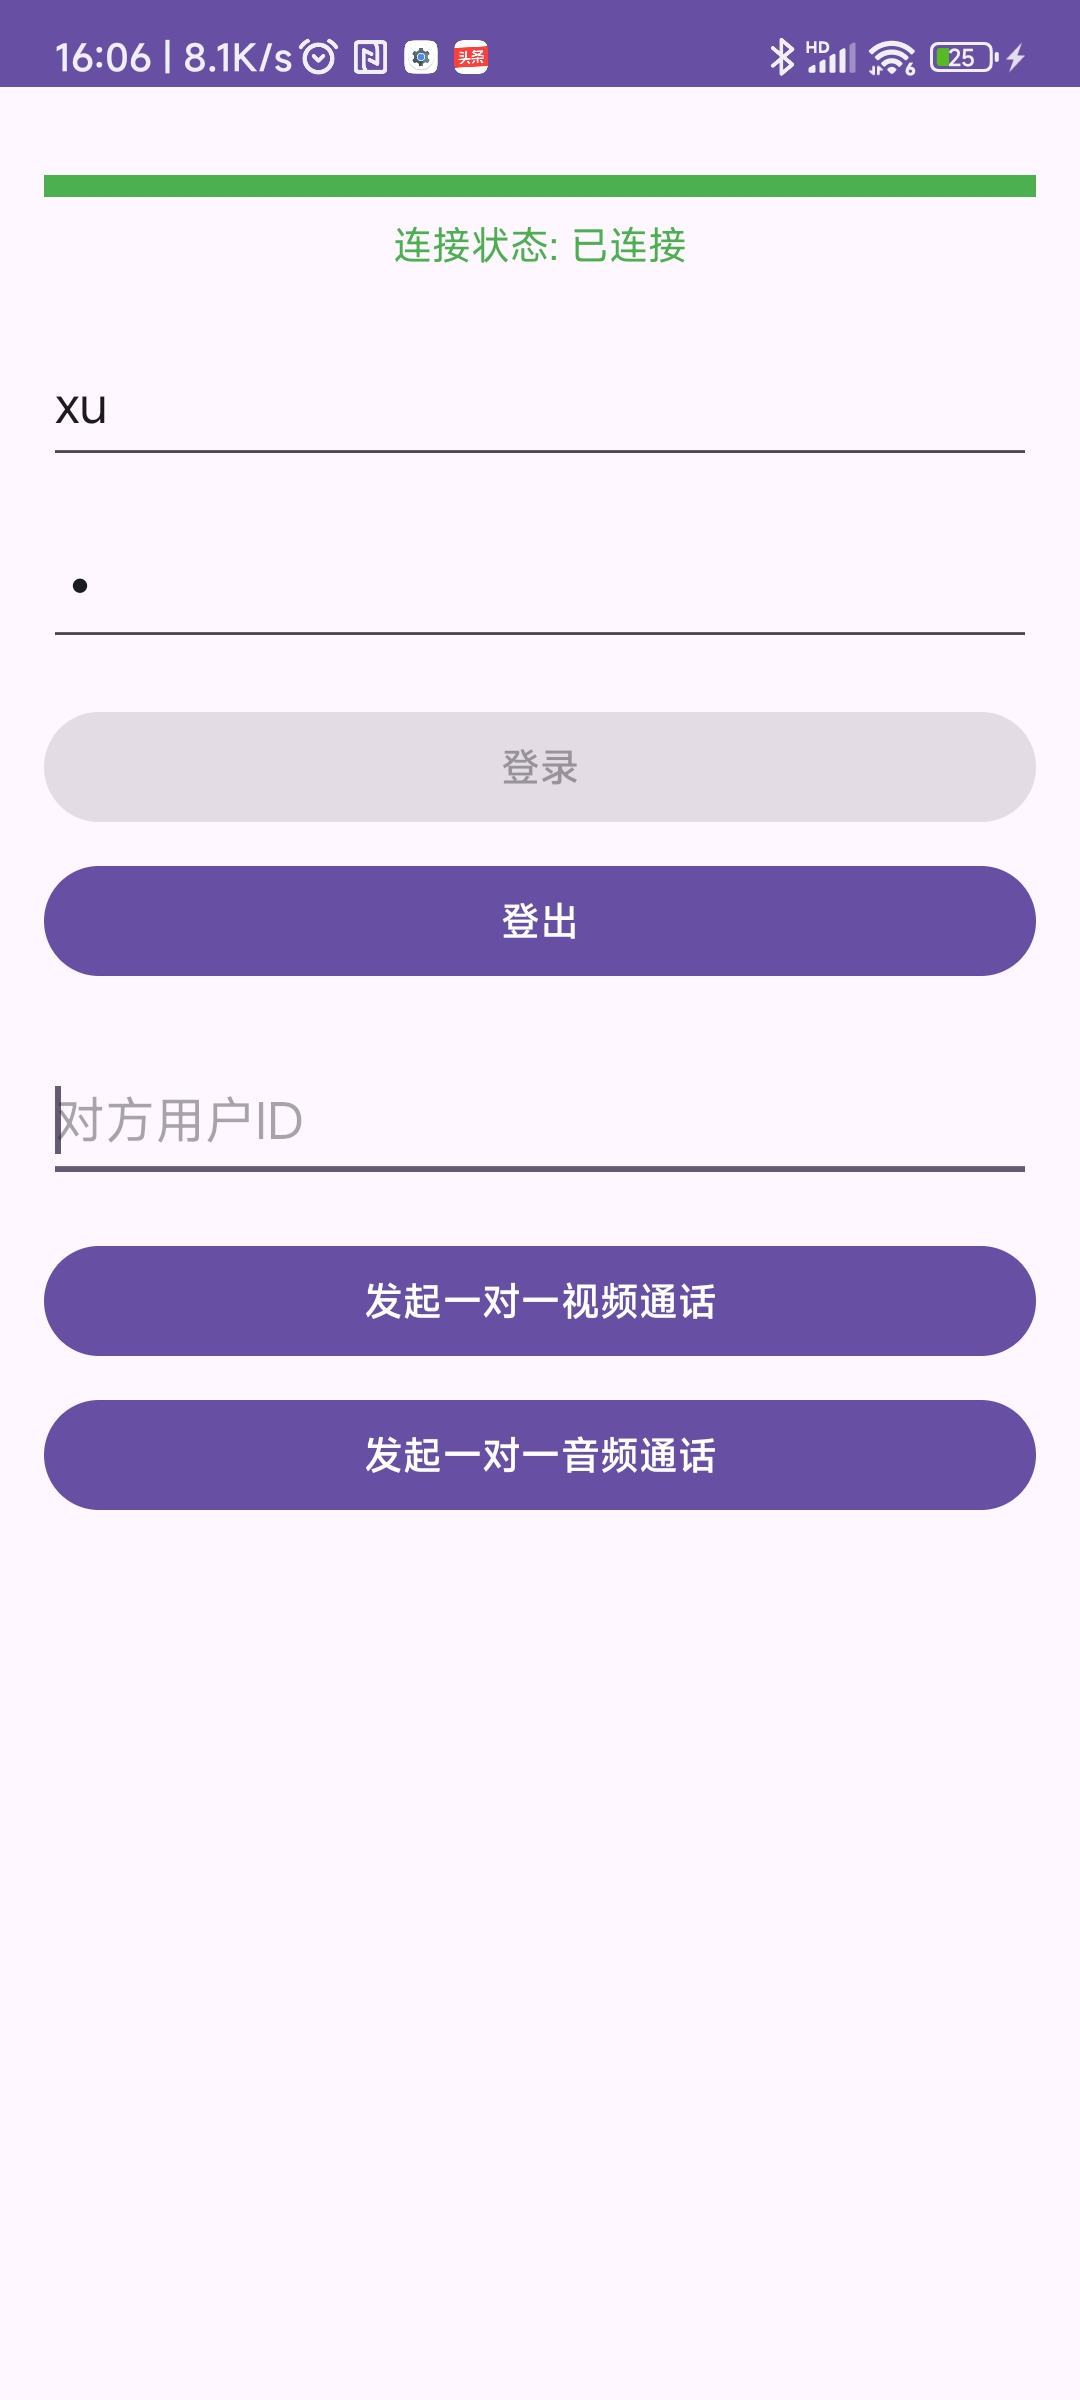
步骤 5 发起首次通话
- 登录:点击 登录。等待连接状态指示器变绿,显示 已连接。
- 发起通话:输入对方用户 ID,点击 发起一对一视频通话 或 发起一对一音频通话。
- 授权权限:在弹出的权限请求中,允许访问摄像头和麦克风等权限。
- 通话控制:在通话中可以控制静音、摄像头、扬声器等,或者点击挂断按钮结束通话。
运行应用
运行应用前,你需要授权摄像头、麦克风、悬浮窗等权限。
- 在 Android Studio 中,点击 Run 'app',将应用运行到你的设备或者模拟器上。
- 点击 登录 进行登录,登录成功或者失败有
Toast提示。 - 更改用户名和token后,在另一台设备上运行并点击登录。
- 在主叫设备上输入被叫方的用户 ID,点击对应的通话按钮,即可发起音视频通话。
运行应用过程中的常见问题排查如下:
- 连接失败:检查 App Key、用户名、token 是否正确配置。
- 通话无声音:检查麦克风权限是否已授权。
- 视频无画面:检查摄像头权限是否已授权。