发送推送 Token 到环信服务器
大约 2 分钟
React Native 集成文档
发送推送 Token 到环信服务器
环信即时通讯 IM SDK 通过 react-native-push-collection 获取推送 token。本文介绍如何将推送 token 发送到环信服务器。
实现流程
步骤一 添加即时通讯 SDK 依赖
在当前应用中添加即时通讯 IM SDK 依赖。
yarn add react-native-chat-sdk
步骤二 获取推送证书信息
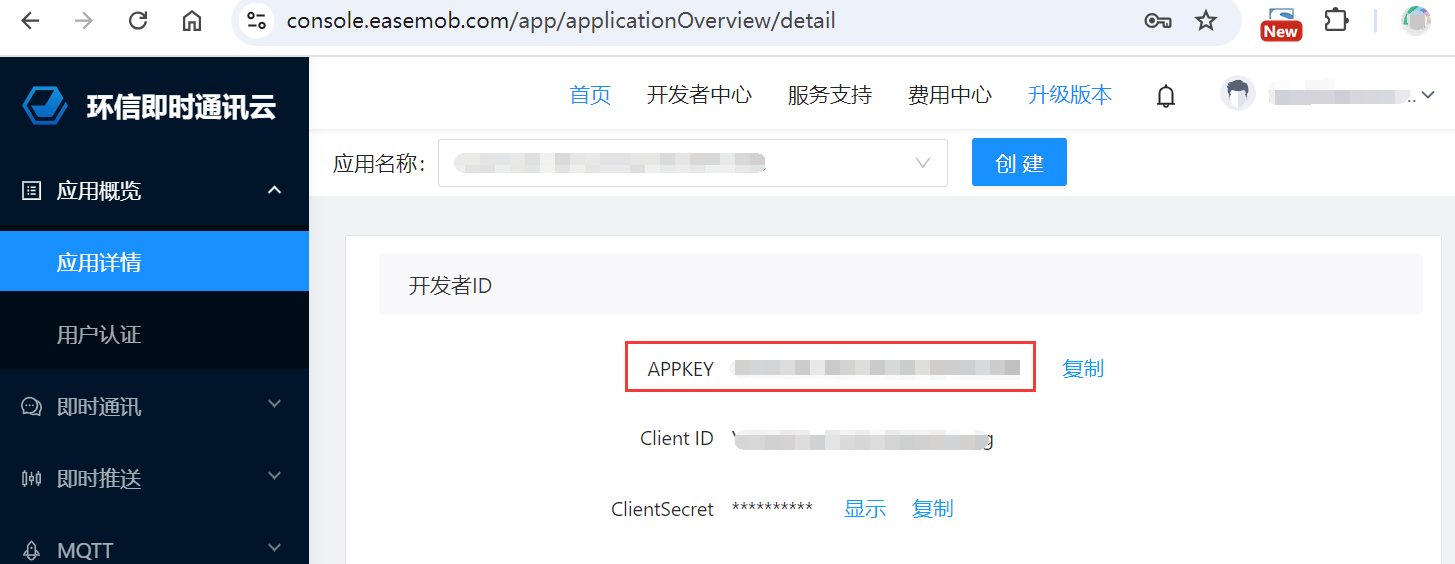
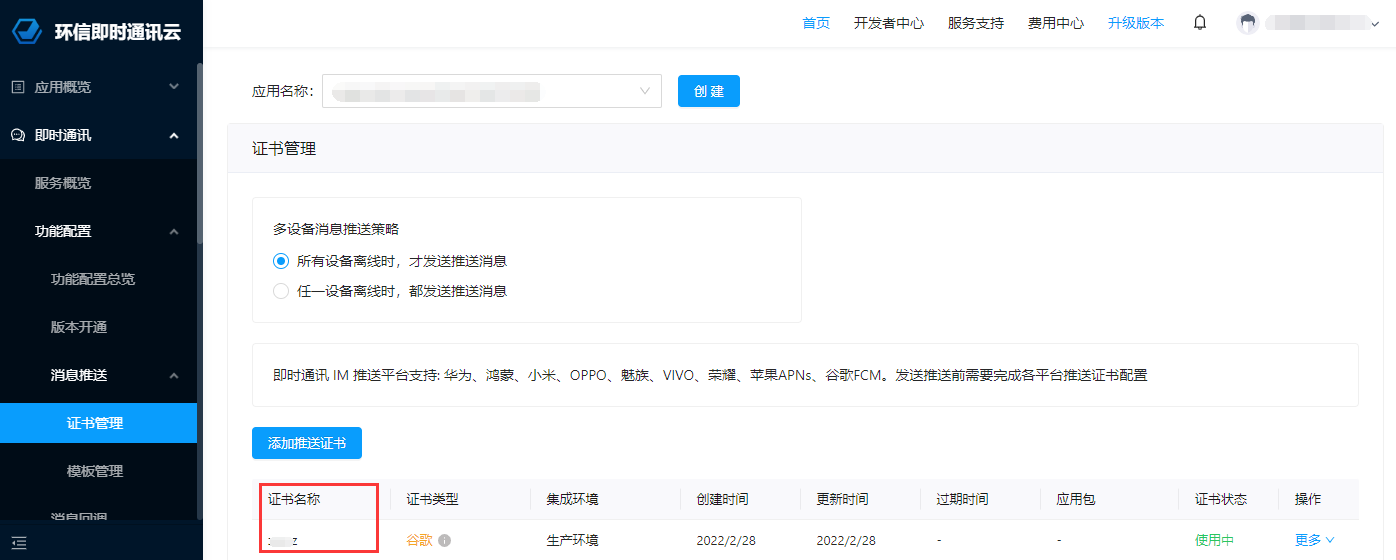
从环信控制台获取推送证书信息,配置应用的 App Key(appKey)和推送证书名称(pushId)信息。
appKey:在环信控制台的 应用概览 页面查看。pushId:推送证书名称。不同厂商的推送证书名称也不同。


import { getPlatform, getDeviceType } from "react-native-push-collection";
import { ChatClient, ChatOptions, ChatPushConfig } from "react-native-chat-sdk";

// 从环信控制台获取推送 ID、pushId
const pushId = "<your push id from easemob console>";

// 设置推送类型
const pushType = React.useMemo(() => {
  let ret: PushType;
  const platform = getPlatform();
  if (platform === "ios") {
    // APNs 或 FCM
    ret = "apns";
  } else {
    // 动态获取设备 token
    ret = (getDeviceType() ?? "unknown") as PushType;
  }
  return ret;
}, []);
步骤三 初始化即时通讯 IM SDK
ChatClient.getInstance()
  .init(
    new ChatOptions({
      appKey: "<your app key>",
      pushConfig: new ChatPushConfig({
        deviceId: pushId,
        deviceToken: undefined,
      }),
    })
  )
  .then(() => {
    onLog("chat:init:success");
  })
  .catch((e) => {
    onLog("chat:init:failed:" + JSON.stringify(e));
  });
步骤四 初始化推送 SDK
ChatPushClient.getInstance()
  .init({
    platform: getPlatform(),
    pushType: pushType,
  })
  .then(() => {
    onLog("push:init:success");
    ChatPushClient.getInstance().addListener({
      onError: (error) => {
        onLog("onError:" + JSON.stringify(error));
      },
      onReceivePushMessage: (message: any) => {
        onLog("onReceivePushMessage:" + JSON.stringify(message));
      },
      onReceivePushToken: (pushToken) => {
        onLog("onReceivePushToken:" + pushToken);
        if (pushToken) {
          // 更新服务端的推送 token
        }
      },
    } as ChatPushListener);
  })
  .catch((e) => {
    onLog("push:init:failed:" + JSON.stringify(e));
  });
步骤五 更新服务端的推送 Token
ChatClient.getInstance()
  .updatePushConfig(
    new ChatPushConfig({
      deviceId: pushId,
      deviceToken: pushToken,
    })
  )
  .then(() => {
    onLog("updatePushConfig:success");
  })
  .catch((e) => {
    onLog("updatePushConfig:error:" + JSON.stringify(e));
  });
运行示例项目
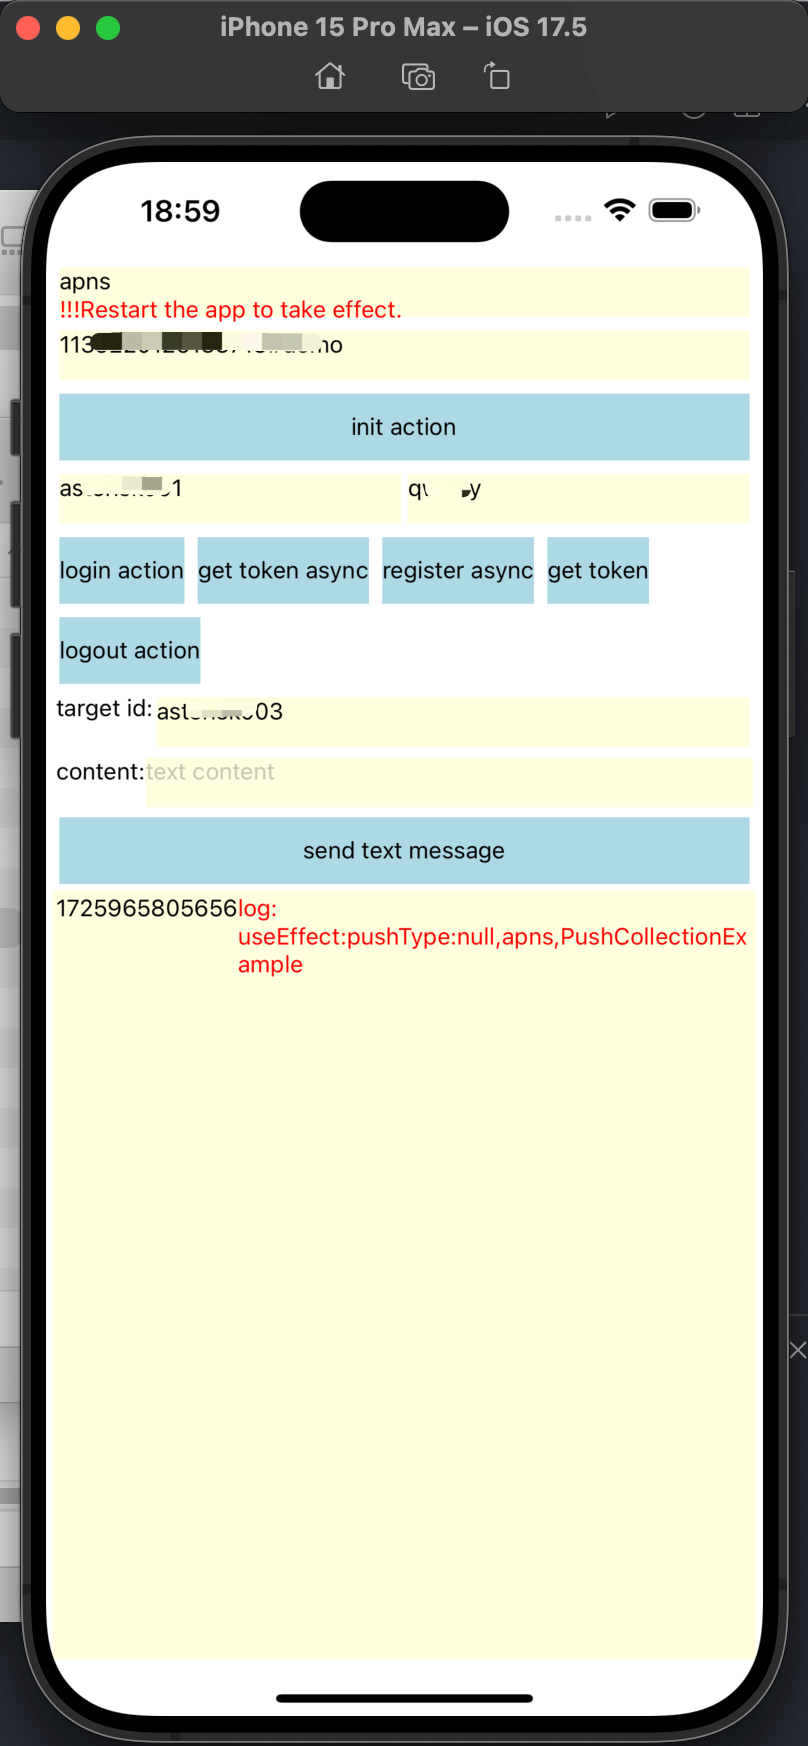
启动项目后,界面如下图所示。
运行示例项目后的界面

在该页面,你可以发送消息,接收方若离线会收到推送通知:
在页面上输入
pushtype和appkey,点击init action按钮, 执行初始化。初始化日志以及后续日志会在空白位置显示。
在页面上输入用户 ID 和密码,点击
login action按钮进行登录。点击
get token action按钮获取推送 Token,并发送到服务端。设置
target id和content输入对端用户 ID 和消息内容,点击send text message按钮发送文本消息。接收方的登录设备会在通知栏收到离线推送通知,如下图所示。
注意:接收离线消息,需要杀死当前登录的应用,否则服务端将按照在线推送消息,不推送离线消息。

