快速开始
快速开始
利用环信单群聊 UIKit,你可以轻松实现单群和群聊。本文介绍如何快速实现在单聊和群聊会话中发送消息。
前提条件
开始前,请确保你的开发环境满足以下条件:
- Android Studio 4.0 或以上
- Android SDK API 21 或以上
- JDK 11 或以上
- 有效的环信即时通讯 IM 开发者账号和 App key,详见 环信控制台文档。
项目准备
本节介绍将单群聊 UIKit 引入项目中的必要环境配置。
本示例使用 Android Studio Ladybug Feature Drop | 2024.2.2, gradle version : 8.10。你也可以参考 Android Studio 官网文档 创建应用。
- 打开 Android Studio,点击左上角菜单File > New > New Project。
- 在 New Project 界面,Phone and Tablet 标签下,选择 Empty Views Activity,然后点击 Next。
- 在 Empty Views Activity 界面,依次填入以下内容:
- Name:你的 Android 项目名称,如 Quickstart。
- Package name:你的项目包的名称,如 com.easemob.quickstart。
- Save location:项目的存储路径。
- Language:项目的编程语言,如 Kotlin。
- Minimum SDK:项目的最低 API 等级,如 API 21。
- Build configuration language:工程构建语言,如 Kotlin DSL(build.gradle.kts)。
然后点击 Finish。根据屏幕提示,安装所需插件。
在项目中引入单群聊 UIKit
- 添加 UIKit 依赖
远程依赖
- 在 Project 工程根目录下的
settings.gradle.kts文件内,添加mavenCentral()仓库。
pluginManagement {
   repositories {
      ...
      mavenCentral()
   }
}
dependencyResolutionManagement {
    repositoriesMode.set(RepositoriesMode.FAIL_ON_PROJECT_REPOS)
    repositories {
        ...
        mavenCentral()
    }
}
- 在 app(module) 目录的
build.gradle.kts文件中添加以下依赖:
dependencies {
    ...
    implementation("io.hyphenate:ease-chat-kit:4.13.0")
}
若要查看 UIKit 的最新版本号,请点击这里。
本地依赖
从 GitHub 或 Gitee 获取单群聊 UIKit 源码,按照下面的方式集成:
- 在 Project 工程根目录下的
settings.gradle.kts文件中添加如下代码:
include(":ease-im-kit")
project(":ease-im-kit").projectDir = File("../chatuikit-android/ease-im-kit")
- 在 app(module) 目录的
build.gradle.kts文件中添加如下代码:
dependencies {
    ...
    //chatuikit-android
    implementation(project(mapOf("path" to ":ease-im-kit")))
}
- 配置 ViewBinding
在 app 项目的 build.gradle.kts 文件中添加如下代码:
android {
    ...
    buildFeatures{
        viewBinding = true
    }
}
- Android Support 库向 AndroidX 转换配置
在 Project 工程根目录下的 gradle.properties 文件中额外添加如下配置。
android.enableJetifier=true
- 防止代码混淆
在 app 的 proguard-rules.pro 文件中添加如下代码:
-keep class com.hyphenate.** {*;}
-dontwarn  com.hyphenate.**
实现发送第一条单聊消息
本节介绍如何通过单群聊 UIKit 实现发送第一条单聊消息。
第一步 创建快速开始页面
- 打开
app/src/main/res/values/strings.xml文件,并替换为如下内容:
<resources>
    <string name="app_name">Quickstart</string>

    <string name="app_key">[您申请的 app key]</string>
</resources>
提示
你需要将 app_key 替换为你申请的 App Key。
- 打开
app/src/main/res/layout/activity_main.xml文件,并替换为如下内容:
<?xml version="1.0" encoding="utf-8"?>
<LinearLayout xmlns:android="http://schemas.android.com/apk/res/android"
    xmlns:tools="http://schemas.android.com/tools"
    android:layout_width="match_parent"
    android:layout_height="match_parent"
    android:orientation="vertical"
    android:id="@+id/main"
    tools:context=".MainActivity">

    <EditText
        android:id="@+id/et_userId"
        android:layout_width="match_parent"
        android:layout_height="50dp"
        android:layout_margin="20dp"
        android:hint="UserId"/>

    <EditText
        android:id="@+id/et_password"
        android:layout_width="match_parent"
        android:layout_height="50dp"
        android:layout_margin="20dp"
        android:hint="Password"/>

    <Button
        android:id="@+id/btn_login"
        android:layout_width="match_parent"
        android:layout_height="50dp"
        android:layout_margin="20dp"
        android:onClick="login"
        android:text="Login"/>

    <Button
        android:id="@+id/btn_logout"
        android:layout_width="match_parent"
        android:layout_height="50dp"
        android:layout_margin="20dp"
        android:onClick="logout"
        android:text="Logout"/>

    <EditText
        android:id="@+id/et_peerId"
        android:layout_width="match_parent"
        android:layout_height="50dp"
        android:layout_margin="20dp"
        android:hint="PeerId"/>

    <Button
        android:id="@+id/btn_chat"
        android:layout_width="match_parent"
        android:layout_height="50dp"
        android:layout_margin="20dp"
        android:onClick="startChat"
        android:text="Start Chat"/>

</LinearLayout>
第二步 实现代码逻辑
初始化 UIKit。
实现登录和退出页面。
提示
若你已集成了即时通讯 IM SDK,SDK 的所有用户 ID 均可用于登录单群聊 UIKit。
你需要在环信控制台 创建用户,登录时传入用户 ID 和密码。
在生产环境中,为了安全考虑,你需要在你的应用服务器集成 获取 App Token API 和 获取用户 Token API 实现获取 Token 的业务逻辑,使你的用户从你的应用服务器获取 Token。
完整实现示例代码:
打开 MainActivity 文件,并替换为如下代码。
package com.easemob.quickstart

import android.content.Context
import androidx.appcompat.app.AppCompatActivity
import android.os.Bundle
import android.view.View
import android.widget.Toast
import com.easemob.quickstart.databinding.ActivityMainBinding
import com.hyphenate.easeui.ChatUIKitClient
import com.hyphenate.easeui.common.ChatLog
import com.hyphenate.easeui.common.ChatOptions
import com.hyphenate.easeui.feature.chat.enums.ChatUIKitType
import com.hyphenate.easeui.feature.chat.activities.UIKitChatActivity
import com.hyphenate.easeui.interfaces.ChatUIKitConnectionListener
import kotlinx.coroutines.CoroutineScope
import kotlinx.coroutines.Dispatchers
import kotlinx.coroutines.launch

class MainActivity : AppCompatActivity() {
    private val binding: ActivityMainBinding by lazy { ActivityMainBinding.inflate(layoutInflater) }

    private val connectListener by lazy {
        object : ChatUIKitConnectionListener() {
            override fun onConnected() {}

            override fun onDisconnected(errorCode: Int) {}

            override fun onLogout(errorCode: Int, info: String?) {
                super.onLogout(errorCode, info)
                showToast("You have been logged out, please log in again!")
                ChatLog.e(TAG, "")
            }
        }
    }
    override fun onCreate(savedInstanceState: Bundle?) {
        super.onCreate(savedInstanceState)
        setContentView(binding.root)
        initSDK()
        initListener()
    }

    private fun initSDK() {
        val appkey = getString(R.string.app_key)
        if (appkey.isEmpty()) {
            applicationContext.showToast("You should set your AppKey first!")
            ChatLog.e(TAG, "You should set your AppKey first!")
            return
        }
        ChatOptions().apply {
            // 设置你自己的 app key
            this.appKey = appkey
            // 设置为手动登录
            this.autoLogin = false
            // 设置是否需要接收方发送已达回执。默认为 `false`,即不需要。
            this.requireDeliveryAck = true
        }.let {
            ChatUIKitClient.init(applicationContext, it)
        }
    }

    private fun initListener() {
        ChatUIKitClient.addConnectionListener(connectListener)
    }

    fun login(view: View) {
        val username = binding.etUserId.text.toString().trim()
        val password = binding.etPassword.text.toString().trim()
        if (username.isEmpty() || password.isEmpty()) {
            showToast("Username or password cannot be empty!")
            ChatLog.e(TAG, "Username or password cannot be empty!")
            return
        }
        if (!ChatUIKitClient.isInited()) {
            showToast("Please init first!")
            ChatLog.e(TAG, "Please init first!")
            return
        }
        ChatUIKitClient.login(username, password
            , onSuccess = {
                showToast("Login successfully!")
                ChatLog.e(TAG, "Login successfully!")
            }, onError = { code, message ->
                showToast("Login failed: $message")
                ChatLog.e(TAG, "Login failed: $message")
            }
        )
    }

    fun logout(view: View) {
        if (!ChatUIKitClient.isInited()) {
            showToast("Please init first!")
            ChatLog.e(TAG, "Please init first!")
            return
        }
        ChatUIKitClient.logout(false
            , onSuccess = {
                showToast("Logout successfully!")
                ChatLog.e(TAG, "Logout successfully!")
            }
        )
    }
    // 跳转到聊天页面
    fun startChat(view: View) {
        val username = binding.etPeerId.text.toString().trim()
        if (username.isEmpty()) {
            showToast("Peer id cannot be empty!")
            ChatLog.e(TAG, "Peer id cannot be empty!")
            return
        }
        if (!ChatUIKitClient.isLoggedIn()) {
            showToast("Please login first!")
            ChatLog.e(TAG, "Please login first!")
            return
        }
        // 对于群聊,`username` 替换为群组 ID,`ChatUIKitType.SINGLE_CHAT` 替换为 `ChatUIKitType.GROUP_CHAT`。
        UIKitChatActivity.actionStart(this, username, ChatUIKitType.SINGLE_CHAT)
    }

    override fun onDestroy() {
        ChatUIKitClient.removeConnectionListener(connectListener)
        ChatUIKitClient.releaseGlobalListener()
        super.onDestroy()
    }

    companion object {
        private const val TAG = "MainActivity"
    }
}

fun Context.showToast(msg: String) {
    CoroutineScope(Dispatchers.Main).launch {
        Toast.makeText(this@showToast, msg, Toast.LENGTH_SHORT).show()
    }
}
- 点击
Sync Project with Gradle Files同步工程。现在可以测试你的应用了。
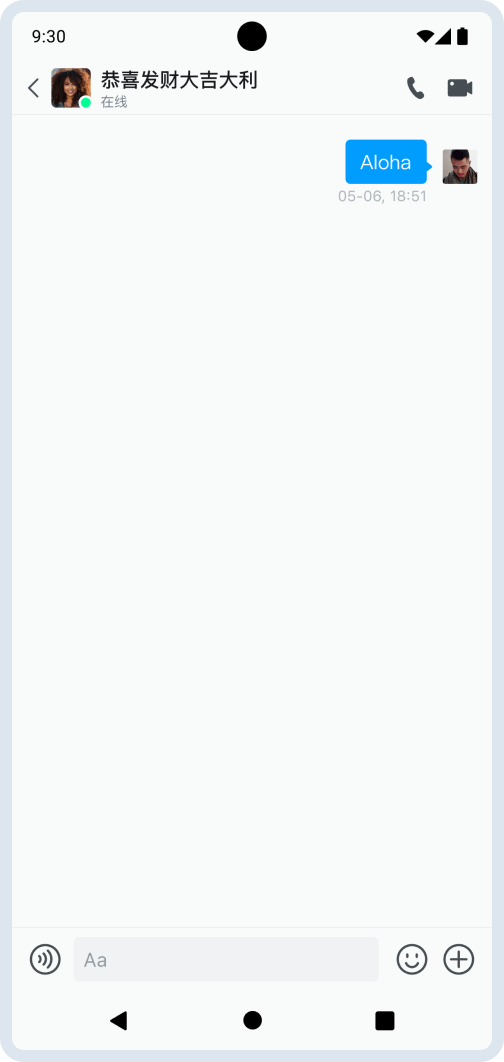
第三步 发送第一条消息
在聊天页面下方输入消息,然后点击发送按钮发送消息。
测试应用
在 Android Studio 中,点击
Run ‘app’按钮,将应用运行到你的设备或者模拟器上。输入用户 ID 和密码,点击
Login按钮进行登录,登录成功或者失败有Toast提示,或者通过 Logcat 查看。在另一台设备或者模拟器上登录另一个账号。
两台设备或者模拟器分别输入对方的账号,并点击
Start Chat按钮,进入聊天页面。现在你可以在两个账号间进行聊天了。