快速开始
快速开始
利用环信单群聊 UIKit,你可以轻松实现单群和群聊。本文介绍如何快速实现在单聊和群聊会话中发送消息。
前提条件
开始前,请确保你的开发环境满足以下条件:
- DevEco Studio NEXT Release(5.0.3.900)及以上;
- HarmonyOS SDK API 12 及以上;
- HarmonyOS NEXT.0.0.71 或以上版本的模拟器或者真机;
- 有效的环信即时通讯 IM 开发者账号和 App Key,请参见 环信控制台文档。
项目准备
本节介绍将单群聊 UIKit 引入项目中的必要环境配置。
打开 DevEco Studio,点击 Create Project。
在 Choose Your Ability Template 界面,选择 Application > Empty Ability,然后点击 Next。
在 Configure Your Project 界面,依次填入以下内容:
- Project name:你的 HarmonyOS 项目名称,如 HelloWorld。
- Bundle name:你的项目包的名称,如 com.hyphenate.helloworld。
- Save location:项目的存储路径。
- Compatible SDK:项目的支持的最低 API 等级,选择
5.0.0(12)及以上。 - Module name:module的名称,默认为
entry。
点击 Finish。根据屏幕提示,安装所需插件。
上述步骤使用 DevEco Studio 5.1.0 Release(5.1.0.828) 示例。
- 在项目中引入 SDK。
远程依赖
在项目根目录下执行如下命令:
ohpm install @easemob/chatuikit
提示
上面的命令在根目录执行,会将 SDK 依赖添加到项目级别;如果要将 SDK 依赖到 Module 级别,需要在对应的 Module 目录下执行上面的命令。
若要查看 UIKit 的最新版本号,请参见 更新日志。
源码依赖
从 GitHub 或 Gitee 上获取 UIKit 源码,按照下面的方式集成:
- 点击 Import,选择 Import Module,导入
chatuikit模块。 - 在项目 Module 中引入
chatuikit模块。
修改模块目录的 oh-package.json5 文件,在 dependencies 节点增加依赖声明。
"dependencies": {
    "@easemob/chatuikit": "file:./../chatuikit"
}
然后点击同步按钮,同步完成后,就可以在模块中使用 chatuikit 。
- 添加项目权限。
在模块的 module.json5 ,例如:HelloWorld 中 entry 模块的 module.json5 中,配置示例如下:
{
  module: {
    requestPermissions: [
      {
        name: "ohos.permission.GET_NETWORK_INFO",
      },
      {
        name: "ohos.permission.INTERNET",
      },
      {
        "name": "ohos.permission.MICROPHONE",
        "reason": "$string:record_permission_reason",
        'usedScene': {
          "abilities": [
            "EntryAbility"
          ],
          "when": "always"
        }
      }
    ],
  },
}
需要在对应模块的 string.json 文件中增加如下:
{
    "name": "record_permission_reason",
    "value": "录制语音需要"
}
实现发送第一条单聊消息
本节介绍如何通过单群聊 UIKit 实现发送第一条单聊消息。
创建快速开始页面及实现代码逻辑
- 打开
entry/src/main/ets/pages/Index.ets文件,并替换为如下内容:
import { ChatPageParams, ChatUIKitClient, ChatClient, ChatError, ChatOptions, ConversationType } from '@easemob/chatuikit';

@Entry
@Component
struct Index {
  pathStack: NavPathStack = new NavPathStack();
  private appKey: string = [项目的AppKey]; // 将[项目的AppKey]替换为项目的 App Key 字符串
  private userId: string = '';
  private token: string = '';
  private peerId: string = '';

  private initSDK() {
    let options = new ChatOptions({
      appKey: this.appKey
    });
    options.setAutoLogin(false);
    let client = ChatClient.getInstance();
    client.init(this.getUIContext().getHostContext(), options);
    ChatUIKitClient.init(client);
  }

  private login() {
    if (!this.userId || !this.token) {
      this.getUIContext().getPromptAction().showToast({message: "UserId or token cannot be empty!"});
      return;
    }
    ChatUIKitClient.login(this.userId, this.token)
      .then(() => {
        this.getUIContext().getPromptAction().showToast({message: "Login successful!"});
      })
      .catch((e: ChatError) => {
        this.getUIContext().getPromptAction().showToast({message: "Login failed: "+e.description});
      })
  }

  private logout() {
    ChatUIKitClient.logout(false)
      .then(() => {
        this.getUIContext().getPromptAction().showToast({message: "Logout successful!"});
      })
  }

  private startChat() {
    if (!this.peerId) {
      this.getUIContext().getPromptAction().showToast({message: "Peer id cannot be empty!"});
      return;
    }
    this.pathStack.pushPath({name: 'ChatPage', param: {
      conversationId: this.peerId,
      conversationType: ConversationType.Chat
    } as ChatPageParams})
  }

  aboutToAppear(): void {
    this.initSDK();
  }

  build() {
    Navigation(this.pathStack) {
      Column() {
        TextInput({placeholder: 'UserId'})
          .commonStyle()
          .onChange(value => this.userId = value)

        TextInput({ placeholder: 'Token', text: this.token })
          .commonStyle()
          .onChange(value => this.token = value)

        Button('Login')
          .commonStyle()
          .onClick(()=> {
            this.login();
          })

        Button('Logout')
          .commonStyle()
          .onClick(()=> {
            this.logout();
          })

        TextInput({placeholder: 'PeerId'})
          .commonStyle()
          .onChange(value => this.peerId = value)

        Button('Start Chat')
          .commonStyle()
          .onClick(()=> {
            this.startChat();
          })
      }
      .width('100%')
      .height('100%')
    }
  }

  @Styles
  commonStyle() {
    .width('80%')
    .margin({
      top: 20
    })
  }
}
- 现在可以测试你的应用。
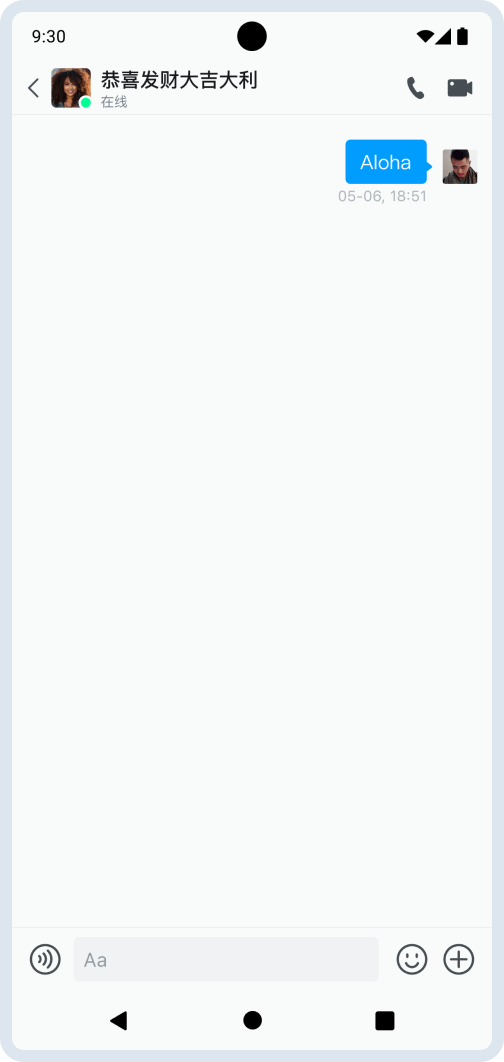
发送第一条消息
在聊天页面下方输入消息,然后点击发送按钮发送消息。
测试应用
在 DevEco Studio 中,点击
Run ‘entry’按钮,将应用运行到你的设备或者模拟器上。输入用户 ID 和密码,点击
Login按钮进行登录,登录成功或者失败有提示,或者通过 Log 查看。在另一台设备或者模拟器上登录另一个账号。
两台设备或者模拟器分别输入对方的账号,并点击
Start Chat按钮,进入聊天页面。现在你可以在两个账号间进行聊天。